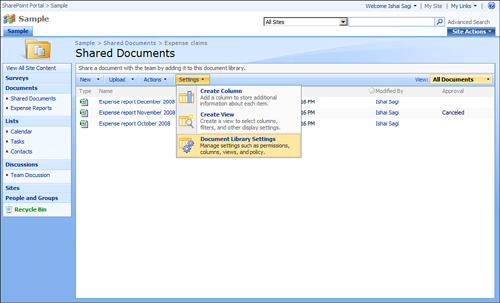
To attach different workflows to a list or library,
you will need the manage list or manage library permission on that list
or library. If you have those permissions, open the list’s or library’s
setting page by clicking the Settings button in the toolbar and
selecting Document Library Settings or Document List Settings (see Figure 1).
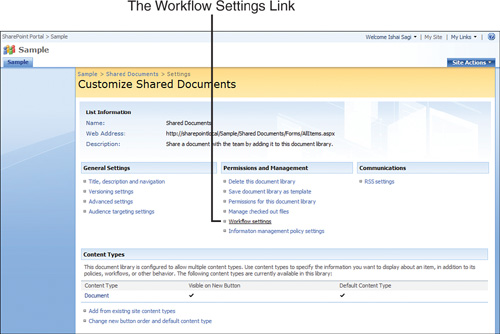
In the list’s or library’s setting page, click the Workflow Settings link under the Permissions and Management section (see Figure 2).
The Workflow Settings page for a list or library enables you to associate a workflow with that list or library (see Figure 3).
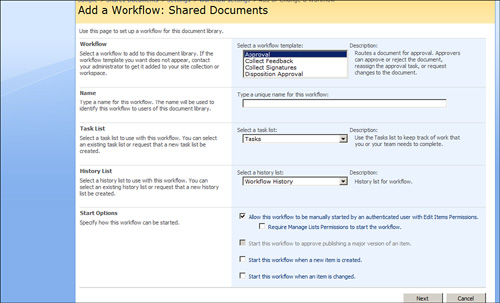
Here,
you can define what workflow you want to create on the list or library
by selecting from the workflow box that lists the available workflows.
By default, the only workflows available in MOSS are the four built-in
workflows:
Approval:
Allows starting an approval workflow on the list’s or library’s items,
where approvers can approve or reject the document or list item,
reassign the approval task, or request changes to the document.
Collect Feedback:
Allows starting a review workflow for a document or list item in the
list or library. Reviewers can provide feedback, which is compiled and
sent to the owner of the file or list item when the workflow has
completed.
Collect Signatures: Allows starting a workflow for collecting signatures that are required to complete a business process on a document. Note:
This workflow can be started only from within a Microsoft Word 2007 or
Microsoft Excel 2007 client, and then only from certain versions of
Microsoft Office 2007 (Ultimate, Professional Plus, and Enterprise). If
you cannot start this workflow from your Microsoft Office client, check
the version of your Microsoft Office and upgrade if necessary.
Disposition Approval:
Allows starting a workflow to manage document expiration and retention.
As part of the workflow, people involved with the file or list item are
required to decide whether to retain or delete expired documents.
In WSS, only one
workflow is available as a built-in workflow: the three-state workflow.
This is the same workflow as the approval workflow described earlier and
tracks the progress of approval of a document or a list item through
three states: Active, Ready for Review, and Complete.
After
you pick a workflow, choose a name for it. Because more than one
workflow of any type can be attached to the document library or list,
each must have a unique name so that the users can recognize it in the
list of workflows. For example, a document library might require two
approval workflows: one for expense claims and one for travel expenses.
To create those two, you need to add them, both as approval workflows,
but each one with a different name.
The next choice is what
task list the workflow will use to create tasks associated with it. The approval workflow creates tasks for
approvers to approve the file or list item when the workflow starts.
You can point each workflow to a specific task list or select that the
workflow will create a new task list for itself.
The History List
section enables you to define where the workflow will report its
progress, for the purpose of storing the history. When viewing a workflow’s progress, you can see the
history of steps that were done in the workflow. Here, you can define in
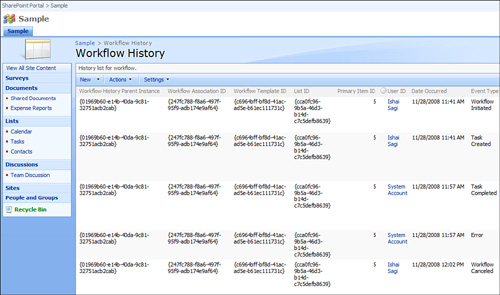
which list that history is kept. By default, the history is kept in a
hidden list called Workflow History that the users do not ordinarily see
(see Figure 4). If you want to store the information in another list, you can define that here.
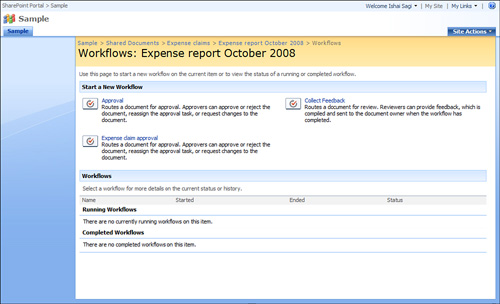
Finally, the last section of the page, Start Options, enables you to specify when the workflow will start (see Figure 5).
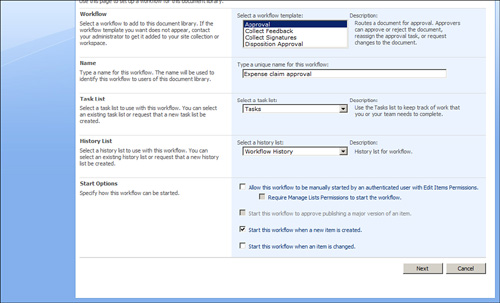
With
the first option users will be able to start it manually, whereas the
third option will cause the list or library to start the workflow
automatically when a new item or file is added to the list or library.
As you can see in Figure 5,
if you choose to let the users start the workflow manually, the users
must have the Edit Items permission on the list or library; otherwise,
they will not be able to start the workflow on any item. Select the
Require Manage Lists Permissions to Start the Workflow check box to
allow only managers of the list to be able to start the workflow.
The second option,
Start This Workflow to Approve Publishing a Major Version of an Item,
can be used only if the list or library has versioning set to allow
major and minor versions. If this option is selected, this workflow will
start when a user submits a file or list item for approval to get
published as a major version.
The last option causes the workflow to start when an item or a file is changed in the list or library.
When you are finished
configuring the workflow, click Next to open the workflow’s association
form (if the workflow has one). A workflow association form is different
for each workflow type and is used to configure settings that are
specific for that workflow type (see Figure 6).
For example, the approval workflow’s association form enables you to
set whether the approval is done in parallel or in a serial manner. Parallel approval means that all the approvers get an email at the same time, whereas serial approval means the first approver on the list must approve before the second one gets the request to approve, and so on.

When you are done
setting the configuration for the workflow, or if there were no
additional configuration settings, click OK. Your new workflow is added
to the list of workflows the user can start, as shown in Figure 7, if you selected that users can start the workflow automatically.